

One of the most common ways to create a blog is by using WordPress. Its interface is very beginner friendly and It only takes a couple of clicks and your blog is ready. There are hundreds of tutorials present on the web focusing on WordPress but WordPress is not only a blogging platform, It has turned into a full-fledged CMS (Content Management System). It contains so many features including the ones which regular bloggers don’t use. So If you think that the available CMS’s aren’t your type and you need a simple HTML blog then you are at the right place.
In this post, we’ll be using Jekyll and GitHub pages to create a free blog. Jekyll is a static site generator. This has a couple of benefits. The most important one is that It’s fast since It only has static files. We’ll be using GitHub pages to host our Jekyll blog. The only downside is that you’ll need to get a domain if you don’t like “username.github.io”. We’ve also included the steps to attach a custom domain to your “username.github.io” site in this tutorial.
Note: This tutorial is written for beginners. It is written step by step and doesn’t require working with command line interface. Everything will be performed online on GitHub.
Step 1: Get a GitHub account
The first step is to create a free GitHub account. Head over to github.com and create a new account If you don’t have one. It’s very easy to get a GitHub account. Enter your username, email, password and choose the Free plan.
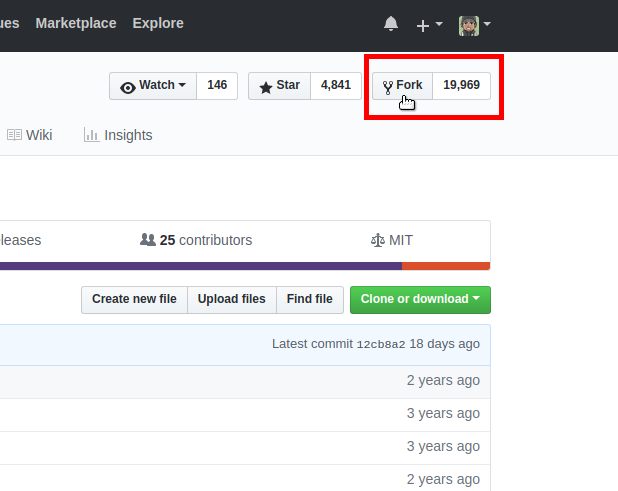
Step 2: Fork Jekyll Now
Forking is the process of making a copy of the original project so that you can experiment with It without messing with the original one. In this step, we’ll be forking Jekyll Now. Head over to Jekyll Now GitHub repository and click the Fork button.

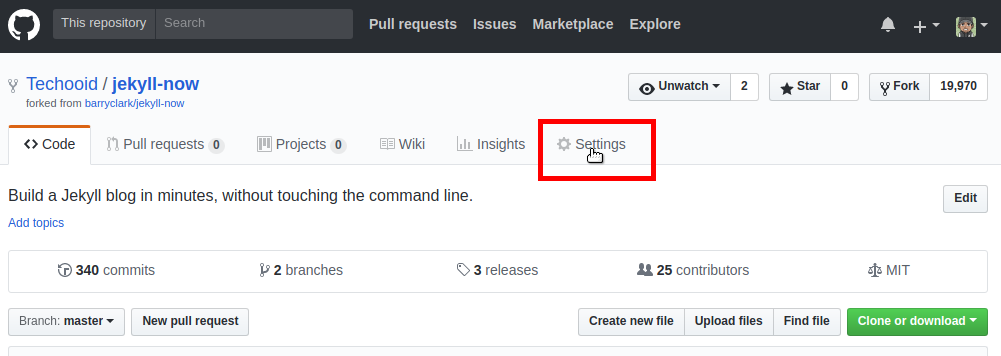
Step 3: Host on GitHub
In this step, we’ll change the name of the repository which we just forked to username.github.io where username is our GitHub account username.
Click on Settings on the repository page.

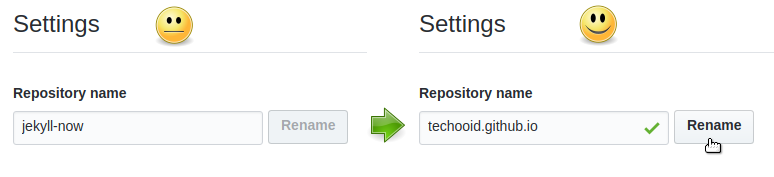
A new page will open and you’ll see a Repository name field with jekyll-now as the name. Change It to username.github.io. Remember to replace “username” with your GitHub account username and hit Rename button.

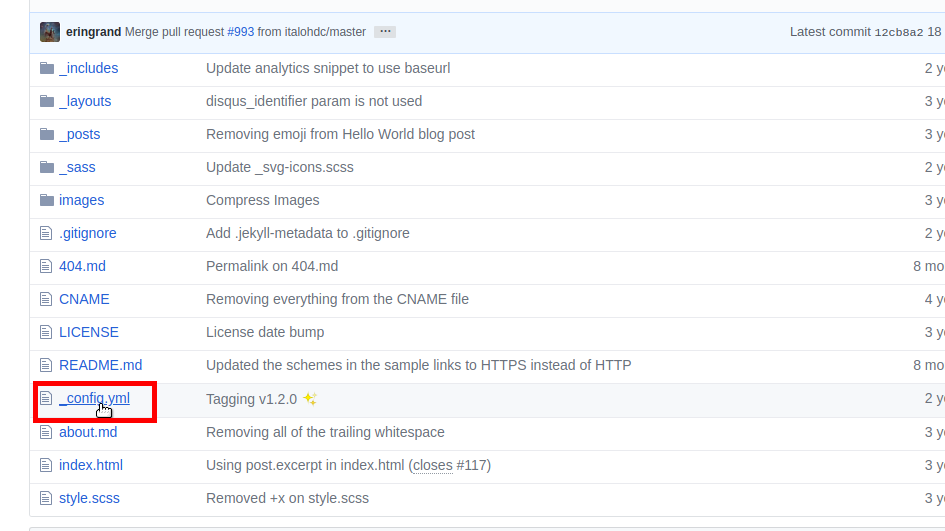
Step 4: Customization
Now we can customize our website by changing Its name, description etc. Look for “_config.yaml” file on your repository and click on It.

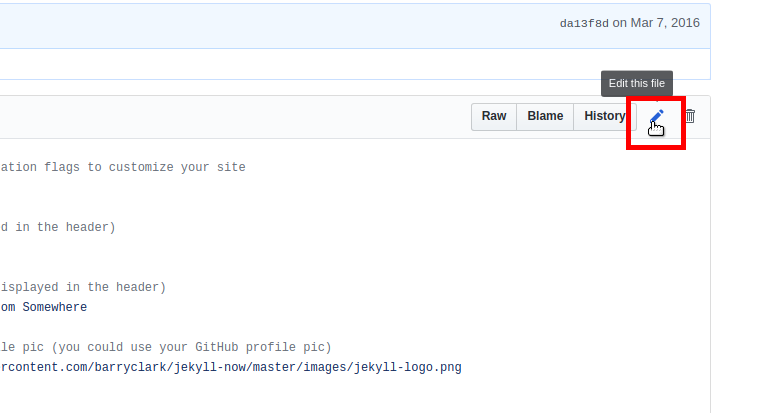
Then click on the pencil icon to edit the _config.yaml file.

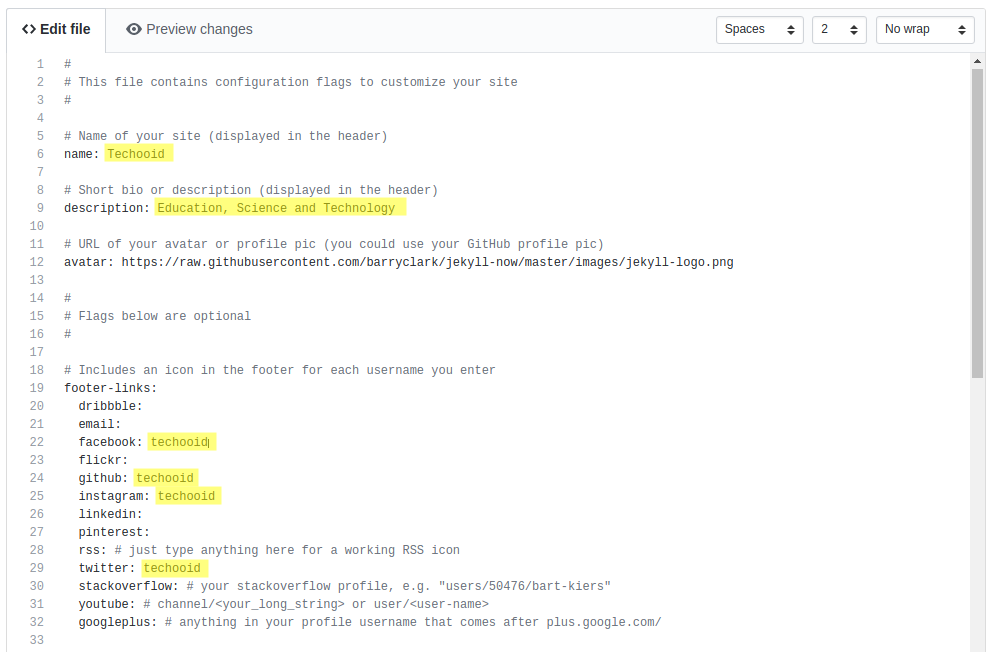
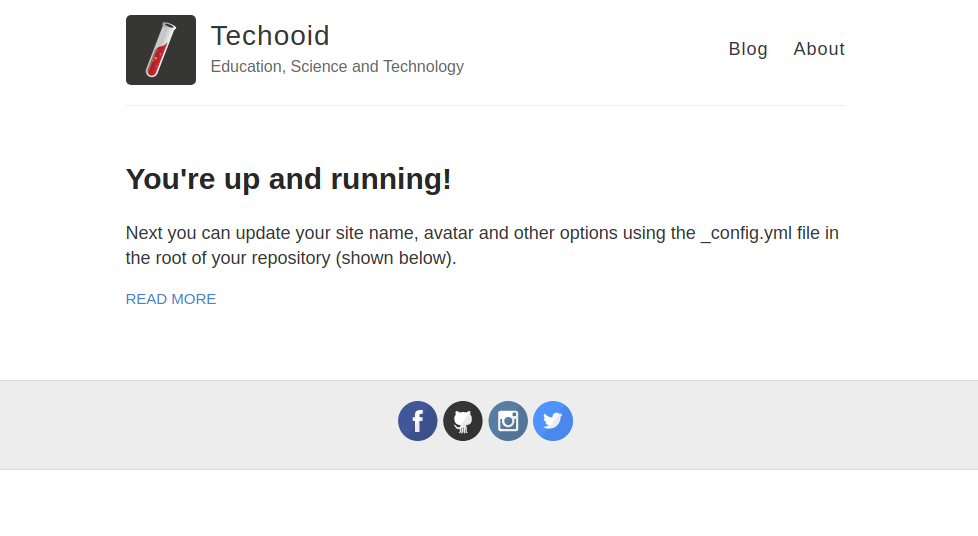
Here you can edit your website’s Name, description, avatar, social media links and much more. We made some changes in our _config.yaml file. Have a look at the below screenshot

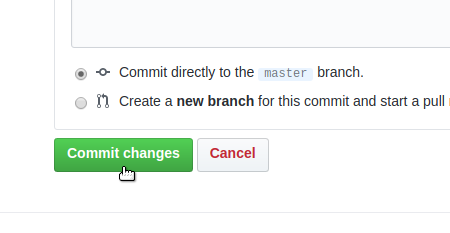
Now scroll down and hit Commit changes button.

Your website is ready now. Visit username.github.io to see your website in action. It’ll look like the below screenshot.

Step 5: Create/Edit/Delete Posts
You’ll need to be familiar with MarkDown to write jekyll posts. Check out MarkDown Cheatsheet by Adam Pritchard to learn about the syntax.
Go to your posts folder in your repository.
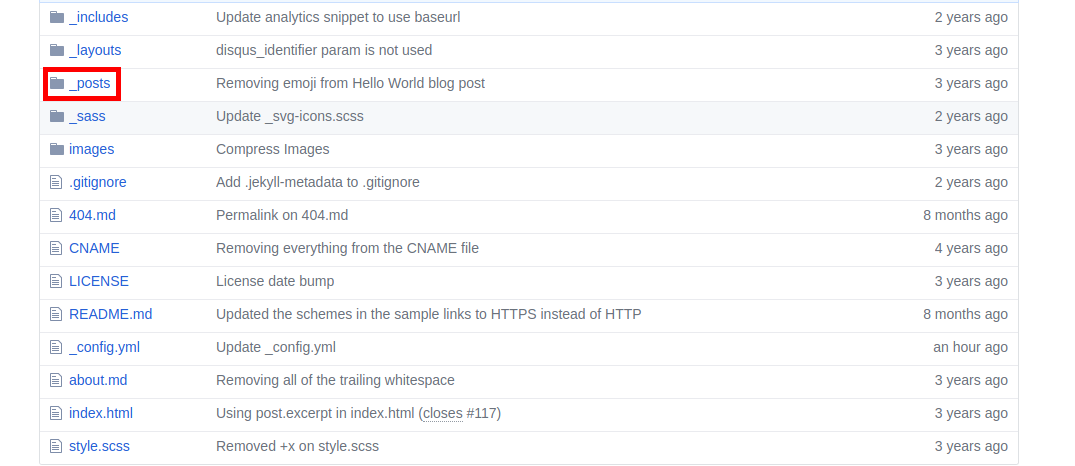

There’ll be one post present there. You can open/edit It to familiarize yourself with the format of Jekyll posts. Jekyll posts should be named using the below format
year-month-day-title.md
2018-4-30-Hello-World.md
You can learn more about posts on official Jekyll documentation.
Step 6: Connect your Domain
We all know username.github.io doesn’t look appealing. A good looking website also has a good looking domain name. People mostly go for .com/.net/.org domains but you can have any domain. If you want to buy a domain name, you can check out the below websites
If you already have a domain then you’re good to follow the below steps.
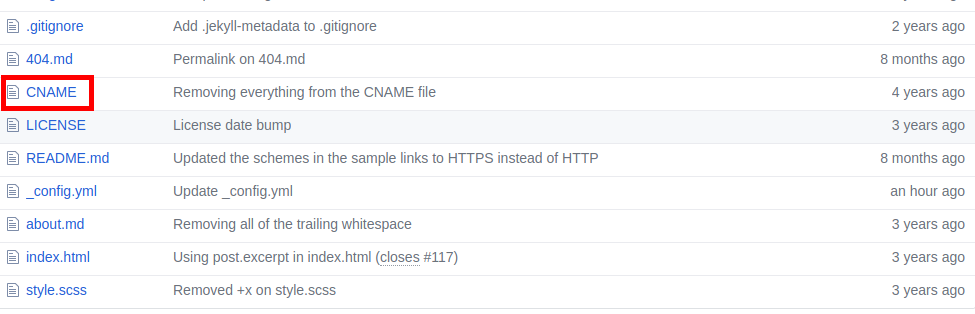
Go to your repository page. Open the CNAME file.

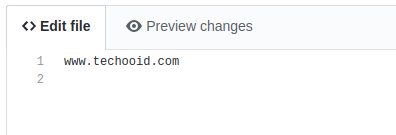
Edit It and write www.example.com. Make sure to replace example.com with your domain name and Commit changes.

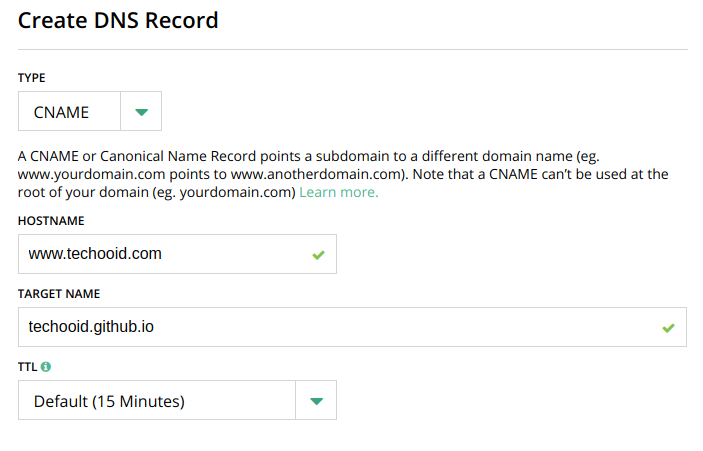
Now go to your domain registrar and add a CNAME record for your domain name as shown below.

If you’re having trouble making a CNAME record then try contacting your domain registrar and they’ll help you out. You can also comment down your domain registrar and we’ll try our best to help out.
You’ve successfully linked your domain name with your Jekyll blog hosted on GitHub pages. It can take up to 24 hours for DNS propagation, so sit back and relax until your domain (www.example.com) starts showing your Jekyll blog.
Let us know If you have any questions.