

Podcast
Improve your podcast sound quality can have a huge effect in the general listening experience for your crowd. Clear, proficient sound aides your substance stick out and keeps your audience members locked in. Here are a few fundamental tips and instruments to work on your digital recording sound quality:
Tips for Podcast
Choose a quit recording environment:
Choose a quit recording environment is essential for working on your webcast sound quality of podcast since it assists you with catching clear and continuous sound. Here is a point-by-point clarification:
Why it’s important:
Background noise:
Background noise, such as traffic, people talking, electronics device or air condition can occupy your audience members and reduce the nature of your digital broadcast.
Echo and reverb:
Rooms with hard surfaces, like walls and floors, can make sound skip around and make a reverberation or reverb impact. This can make your sound less understood and proficient.
Focus on content:
A quiet environment allows you to focus on your content and delivery without being interrupting by outside noise.
How to choose a quiet recording environment
Find a quiet room:
Close window and way to keep outside sound out. Switch off uproarious apparatuses like fans, warmers, or climate controls system while recording. Control internal noise:
Limit sounds that might happen inside the room, like telephones or electronic gadgets.
Consider rooms size and shape:
More modest rooms might assist with containing sound and diminish reverberations yet watch out for excessively bound spaces that might sound as well “square shaped.”
Add soft furnishing:
Soft materials like draperies, covers, and upholstered furniture can assist with engrossing sound and limit reverberations.
Use acoustic panels:
If important, think about putting resources into acoustic boards or other sound-retaining materials to control reflections and further develop acoustics.
2.Quality microphone for Podcast
Utilizing a quality microphone for podcast is quite possibly of the main step you can take to work on your digital broadcast’s sound quality. A decent receiver can catch your voice even more precisely and obviously, while limiting foundation clamour and mutilation. Here is an itemized clarification of this point:
Why it’s important:
Audio clarity:
A quality microphone catches your voice with accuracy and lucidity, making it simpler for your crowd to comprehend and draw in with your substance.
Reduced background noise:
High-quality microphones are frequently intended to zero in on catching sound from a particular bearing (normally cardioid or unidirectional) and can assist with limiting foundation commotion.
Consistency:
A decent receiver gives predictable sound quality, which is significant for keeping an expert and cleaned sound show.
Less post-production:
With a reasonable and clean recording all along, you’ll invest less energy rectifying sound issues during altering.
Types of microphones:
- USB microphone
- XLR microphone
Tips for using a quality microphone:
Choose the right type:
Decide if a USB or XLR mouthpiece is best for your necessities considering your financial plan, recording arrangement, and sound quality objectives.
Positioning:
Place the receiver 6-8 crawls from your mouth and somewhat off kilter to try not to catch plosive sounds (like “P” and “B” sounds) straightforwardly.
Use a pop filter:
A pop channel diminishes plosive sounds and sibilance, assisting with making a smoother recording.
Checking for compatibility:
Ensure your chosen microphone is viable with your recording arrangement (e.g., PC ports, sound point of interaction).
Maintain the microphone:
Deal with your amplifier by putting away it appropriately, cleaning it occasionally, and shielding it from residue and dampness.
Consider your budget:
While top quality microphone can be costly, there are reasonable choices accessible that give amazing sound quality. Research various models and read surveys to track down the most ideal choice affordable enough for you.
3.Position the microphone for :
Appropriate receiver situating is fundamental for accomplishing clear, proficient sound quality in your webcast accounts. The ideal situation helps catch your voice precisely while limiting issues like plosive sounds, sibilance, and undesirable commotion. Here are a few central issues to consider while situating your mouthpiece:
Why proper microphone positioning is important.
Audio clarity:
Proper positioning guarantees that your voice is caught obviously and equitably without contortion or suppressing.
Minimize plosive sound:
Plosive sounds are brought about by eruptions of air while articulating letters like “P” and “B.” Right situating diminishes the effect of these sounds.
Avoid sibilance:
Sibilance is the murmuring sound that happens while articulating “S” and “Z” sounds. Legitimate situating limits this issue.
Reduced background noise:
By situating the receiver accurately, you can zero in on catching your voice while keeping away from undesirable foundation commotion.
Tips for proper microphone positioning
Distance from mouth:
Place the amplifier around 6-8 inches (15-20 cm) away from your mouth. This distance finds some kind of harmony between catching your voice obviously and keeping away from bending.
Angle the microphone:
Rather than pointing the amplifier straightforwardly at your mouth, point it somewhat out of the way. This lessens plosive sounds and sibilance.
Use a pop filter:
A pop filer is a flimsy lattice screen put before the microphone. It facilitates lessen plosive sounds and guarantees smoother sound quality.
Adjust for your voice:
Various voices might require different receiver positions. Explore different avenues regarding the distance and point to find what turns out best for your voice.
Stay consistent:
When you track down the ideal position, make a note of it and attempt to keep up with it reliably for future accounts.
Consider microphone type:
Different microphones have different pickup designs (e.g., cardioid, omnidirectional). Get to know your mouthpiece’s example and change situating likewise.
Mind your posture:
Sit or stand easily and keep your head and mouth at a predictable separation from the receiver to keep away from sound level vacillations.
4. Monitor your audio for :
monitoring your sound is a basic piece of the recording system for webcasts. By effectively standing by listening to your sound as you record, you can recognize and resolve issues continuously, guaranteeing that your accounts sound proficient and clear. Here’s the reason checking your sound is significant and how to successfully make it happen:
why monitoring your audio matters
immediate feedback:
Monitoring permits you to hear precisely the way that your recording sounds as it works out, so you can get and address issues like contortion, commotion, or volume changes on the spot.
Consistency sound quality:
By checking your sound, you can keep a reliable sound quality all through your recording meeting.
Adjusting levels:
You can rapidly change your mouthpiece or sound point of interaction levels to forestall contortion and keep an ideal recording level.
Identifying background noise:
Checking helps you identify and limit foundation commotion that might disrupt your recording.
Hearing your voice as other will:
Paying attention to your sound permits you to hear your voice as your audience members will, so you can change your conveyance, pacing, or volume depending on the situation.
How to monitor your audio
Use closed-back headphone:
Shut back earphones, like the Sound Technica ATH-M50x, give detachment from outside sounds and provide you with an exact portrayal of your recording. They assist you with zeroing in on your sound without outside interruptions.
Adjust volume:
Keep your earphone volume at an agreeable level that permits you to hear your voice plainly without being excessively clearly.
Monitor continuously:
Pay attention to your sound consistently as you record, as opposed to right toward the start or end of a meeting. This assists you with getting any issues as they emerge.
Check for distortion and clipping:
Listen for indications of bending or cutting (when the sound sign is excessively clearly and becomes contorted) and change your recording levels if essential.
Before testing recording:
Continuously do a fast test recording prior to beginning your webcast episode. Tune in back to guarantee your sound quality is clear and at the right level.
Use audio interface for monitoring:
Assuming you have a sound connection point, utilize its checking highlights to hear your sound with negligible idleness and in the best.
Pay attention to room acoustics:
Listen for any progressions in room acoustics or ecological clamor while observing your sound and change your recording climate on a case-by-case basis.
5. Watch your level for Podcast :
<p><p>Checking your sound is a basic piece of the recording system for digital broadcasts. By effectively standing by listening to your sound as you record, you can recognize and resolve issues continuously, guaranteeing that your accounts sound proficient and clear. Here’s the reason checking your sound is significant and how to successfully make it happen:
Why watching your levels is important:
Prevent distortion:
Recording levels that are too high can cause bending, where the sound sign becomes “cut” and sounds unforgiving or twisted.
Ensure clarity:
Proper recording levels assist with catching your voice obviously without losing subtleties or presenting clamor.
Facilitates easier editing:
Reliable and proper recording levels make the altering system smoother and more productive.
Maintains consistency:
Steady sound levels all through your web recording give a superior listening experience to your crowd.
How to watch your levels:
Use VU meters peak meters:
Most recording programming and sound connection points offer visual meters that show your sound levels continuously. Watch these meters as you record.
Aim for average levels around- -12dB:
A typical degree of around – 12dB gives a decent harmony between catching your voice obviously and staying away from mutilation. This is many times set apart as a protected recording level.
Avoid peaking at 0dB:
At the point when your sound reaches or surpasses 0dB, it can cause twisting and cutting. Change your feedback gain to stay away from this.
Set a comfortable gain:
Begin with a moderate info gain setting, then, at that point, change in view of your checking. A lot of gain can cause cutting, while too little can bring about calm, stifled accounts.
Use compression:
Compression can assist with night out your sound levels, forestalling unexpected spikes or plunges in volume. Apply pressure during recording or in after creation depending on the situation.
Tools:
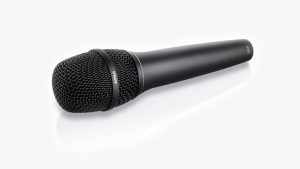
1. Microphone
A microphone is a transducer that converts sound into an electrical sign. Microphone are utilized in numerous applications, for example, phones, portable hearing assistants, public location frameworks for show corridors and public occasions, movie creation, live and recorded sound designing, sound recording, two-way radios, bull horns, and radio and TV broadcasting. They are additionally utilized in PCs and other electronic gadgets, like cell phones, for recording sounds, discourse acknowledgment, VoIP, and different purposes, like ultrasonic sensors or thump sensors.

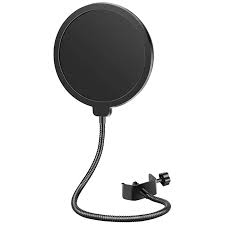
2. Pop filter:
A pop filter, pop shield or pop screen is a commotion security channel for receivers, normally utilized in a recording studio. It serves to lessen or dispose of popping sounds brought about by the mechanical effect of quick air on the microphone from plosives during recorded discourse and singing. Pop filter can likewise keep spit off the microphone during recording.

3. Audio interface:
An audio interface is a piece of computer hardware that allow the input and output of audio signal to and from a host computer or recording device. Audio interfaces are firmly connected with PC sound cards, yet while sound cards are enhanced for sound playback a sound point of interaction is basically expected to give low-inactivity simple to-advanced and computerized design transformation for proficient sound applications.
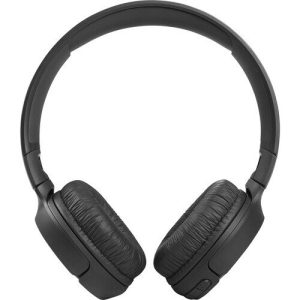
4. Headphone:
Headphones are a couple of little amplifier drivers worn nearby the head over a client’s ears. They are electroacoustic transducers, which convert an electrical sign to a relating sound. Headphone let a solitary client stand by listening to a sound source secretly, as opposed to an amplifier, which radiates sound out from the dark air for anybody close by to hear. Headphones are otherwise called earphone.

5. Acoustic treatment:
Acoustic treatment is the arrangement that will ingest or diffuse sound to work on the acoustic nature of a space. These treatments take many structures, and a few spaces might try and need various sorts of medicines applied to accomplish the ideal conceivable sound quality inside the space.
6. Audio editing software:
Audio editing software is any product or PC program which permits altering and creating sound data. Sound altering programming can be carried out totally or part of the way as a library, as a PC application, as a web application, or as a loadable portion module.
7. Noise reduction plugin:
Noise reduction plugins are in many cases utilized in sound reclamation to work on the nature of more established or harmed accounts. For instance, you can take an old copying and utilize a quality sound minimizer to restrict hum, hiss, clicks, foundation commotion, or other undesirable relics that may be available in the source material.