In this tutorial, we’ll show you how you can install Linux Mint as a Virtual Machine. There are two commonly used virtualization programs, VirtualBox and VMware. VirtualBox is available for free while VMware is free for non-commercial use and you’d have to buy a license for commercial usage. In this tutorial, we’re going with VirtualBox.
The host operating system is Windows 10. It is same for almost all other Windows versions.
Before proceeding, download Linux Mint from Its website and verify Its integrity. We’re using Linux Mint 18.3 “Sylvia” in this tutorial.
Installing Linux Mint in VirtualBox
- First of all go to VirtualBox website, download and install VirtualBox. The procedure is just like installing any other software.
- Open VirtualBox and click on New.

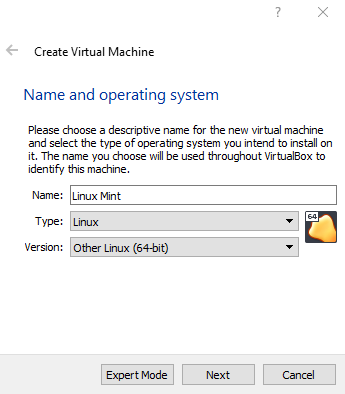
- A new box will open. Type any name in the Name field, choose Linux in type and “Other Linux” in the version field as Linux Mint is not available in the list and click Next.
- It will now ask you that how much RAM you’d like to give your Virtual Machine. We’re going to install Linux Mint 18.3 and It requires a minimum of 1GB RAM but for smooth performance, we’re giving it 2GB of RAM. Just keep It the half of your total memory. Then click Next.

- Now It will ask you for Hard Disk space. Choose to Create a virtual hard disk now and click Create.
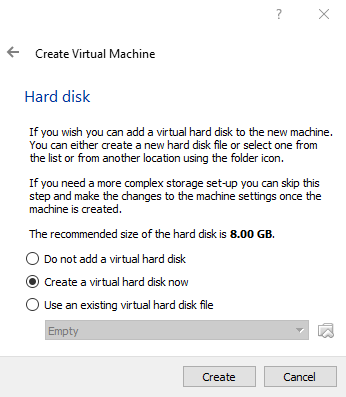
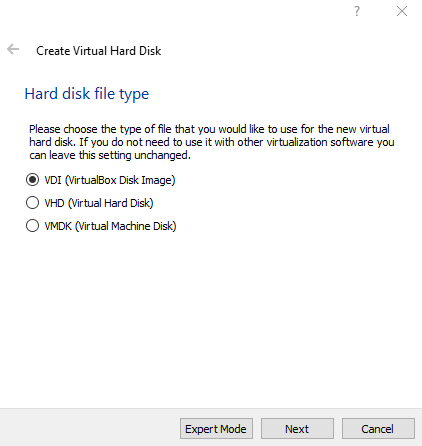
- For the Hard disk file type, leave it as It is. The default option is “VDI (VirtualBox Disk Image). Choose Next.
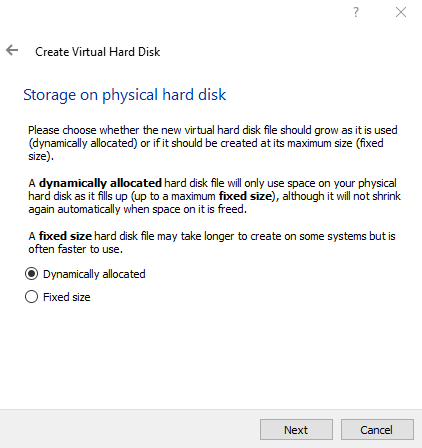
- Choose “Dynamic allocated“ in Storage on physical hard disk and click Next.
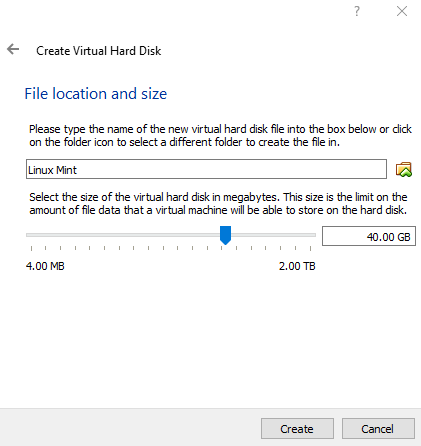
- Now we’ve to set how much space will It use. At least 15GB of disk space is required (as per LinuxMint 18.3 system requirements). You can give It any amount you want. It depends upon how you’re going to use It. We’re giving It 40GB in our case. After adjusting the slider/typing the amount of space you want to give, click Create.
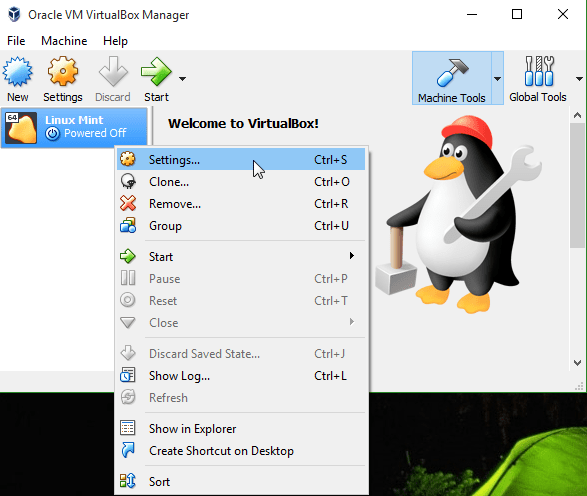
- Now It’s the time to install LinuxMint. Right click on your newly created machine and choose Settings.
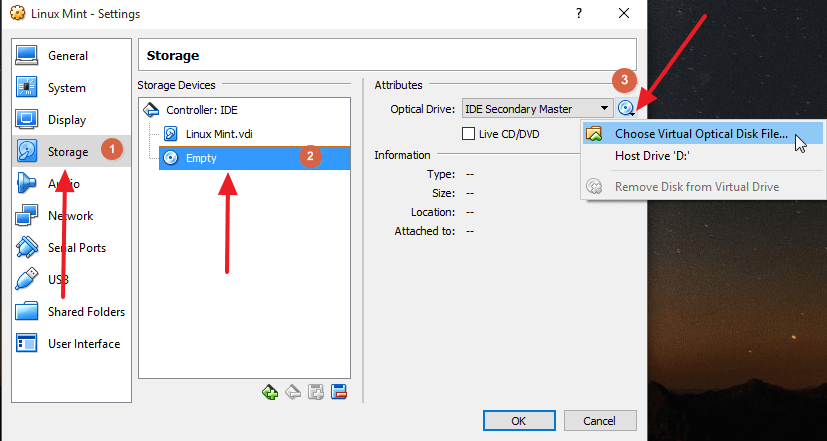
- From the left menu, choose “Storage“, then click on Empty and then click on that little CD icon and select Choose Virtual Optical Disk File….
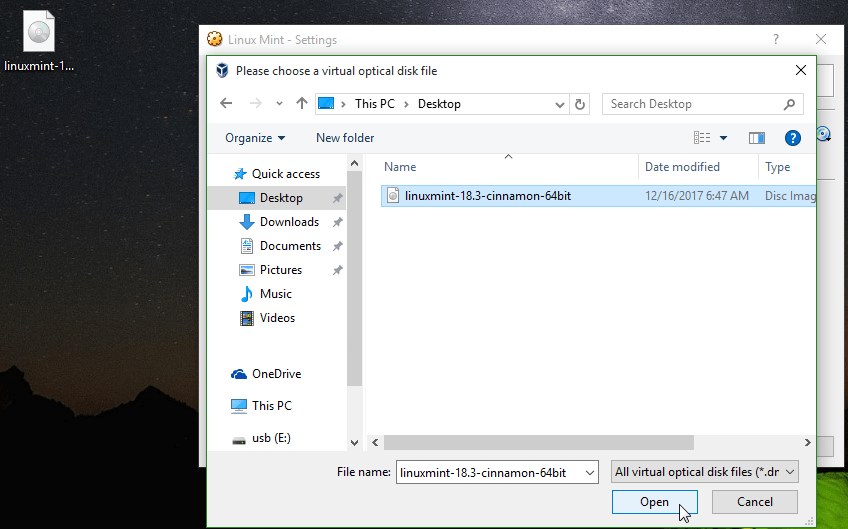
- Now select your downloaded LinuxMint iso file and click Open. Then choose Ok.
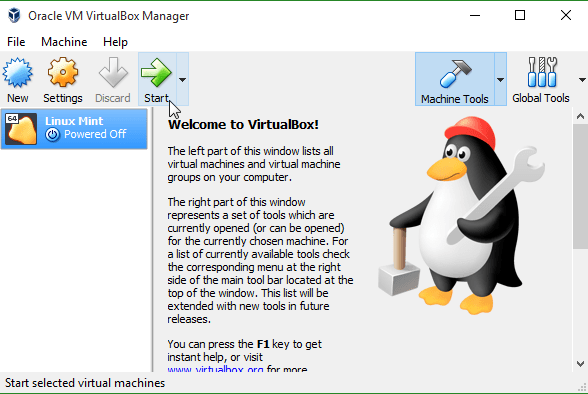
- After that, select your virtual machine and click Start. You’ll see a loading screen saying “Automatic boot in X seconds“.
- After couple of seconds, you’d be presented with the following screen.
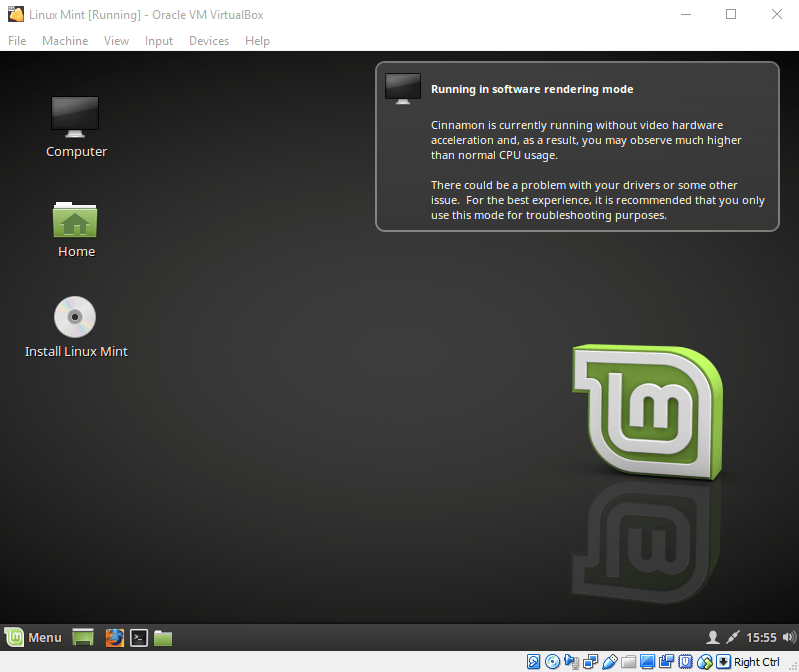
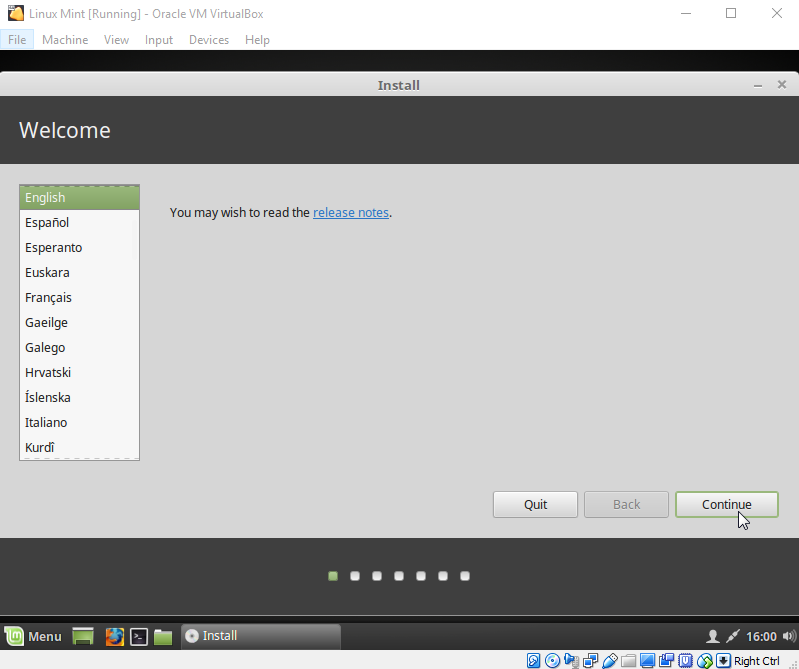
- Double click on Install Linux Mint and an installer will open. Choose your language and hit Continue. You’d be asked if you want to install third-party software for graphics, wifi-hardware etc. If you want to install them, check that box and hit Continue otherwise just leave the box empty and proceed.
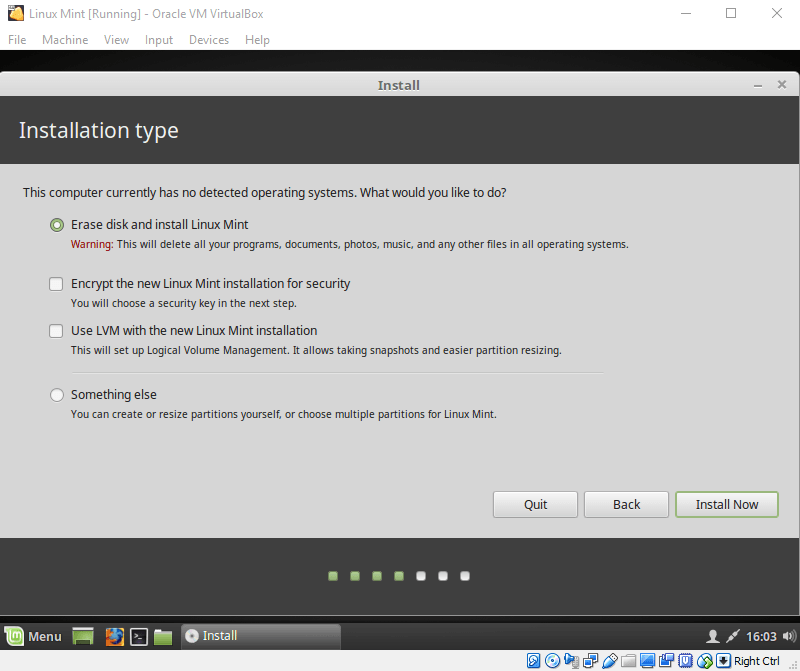
- Now It will ask you for the Installation type. Choose the first option, Erase disk and install Linux Mint and click Install Now.
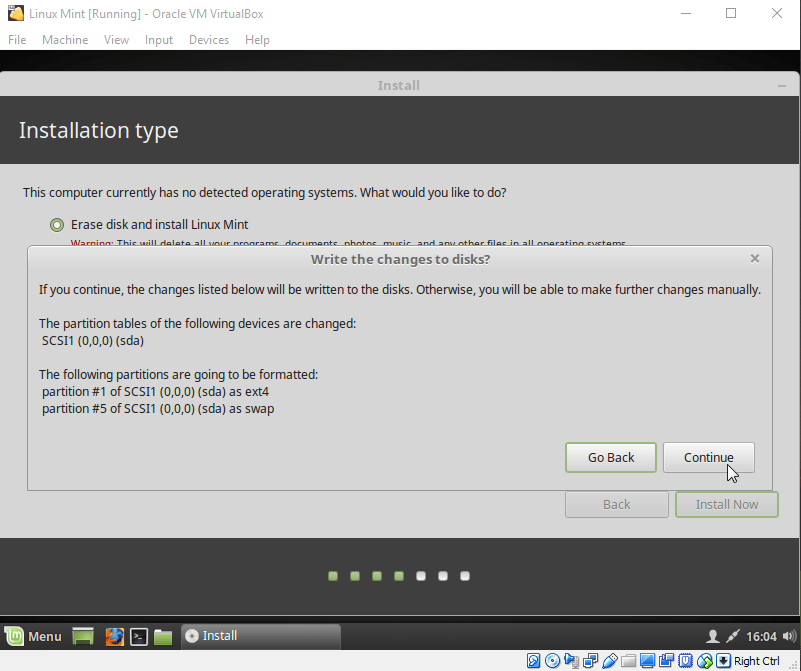
- Click Continue to allow It to make changes to the disks.
- Now It will ask you some basic stuff like Where are you? Keyboard Layout, Your timezone, Name, Password etc. Fill that stuff and keep hitting Continue.
- After the above steps, sit back and relax. It’d take a couple of minutes to install.


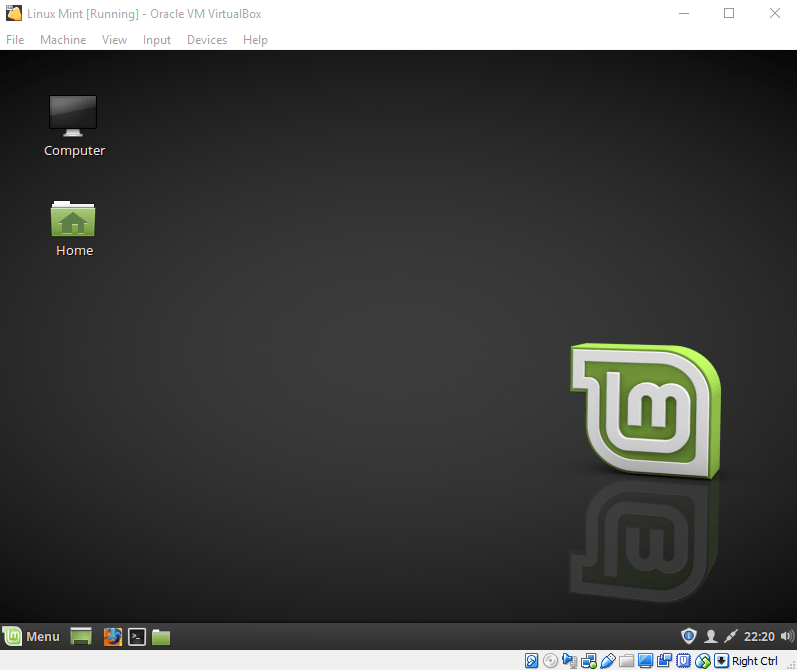
When the installation is finished, It’ll ask you to reboot. Click on reboot and then press Enter when It says “remove your installation media” and after rebooting you’d be presented with your newly installed Linux Mint.