
Raspberry Pi is a great piece of hardware. Attach a monitor, keyboard and a mouse and you’ve got your full-fledged desktop computer. We have written some tutorials which you should check out. However, If you’re not into using it as a desktop PC and want to use it in your project, you would need to configure it before you can access It. With the headless raspberry pi setup, you can control It without any peripheral devices.
In this post, we will share steps to create your headless raspberry pi setup. What we mean by headless raspberry pi setup is that It won’t require a monitor, keyboard and a mouse to operate. You’ll be able to control It using SSH (Secure Shell). You can then attach your raspberry pi to your router with an ethernet cable or you can use WiFi.
For headless raspberry pi setup, you first need to install a Linux operating system on your device. We are choosing Raspbian for our tutorial. Raspbian is the official supported operating system for Raspberry Pi. We will choose the Lite version for the sake of this tutorial. You can choose the version which suits your project.
Download Raspbian
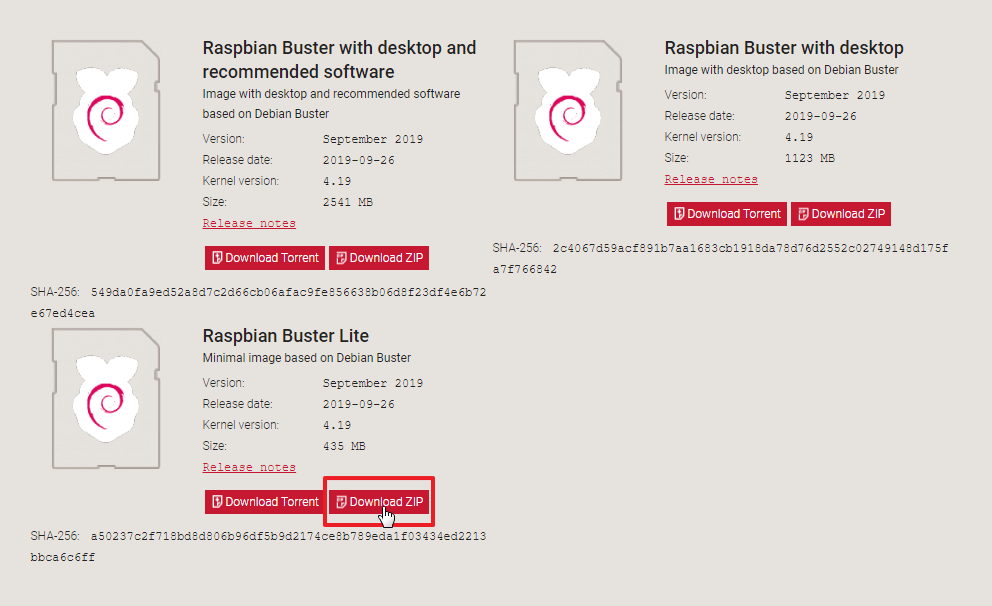
Go to https://www.raspberrypi.org/downloads/raspbian/. Scroll down and you’ll see different Raspbian versions. Choose the version which you want to download and click on Download Zip.
Prepare SD Card
We need to flash the Raspbian operating system (downloaded in the previous step) to our SD card. For this, we will use a very nice tool, Etcher.
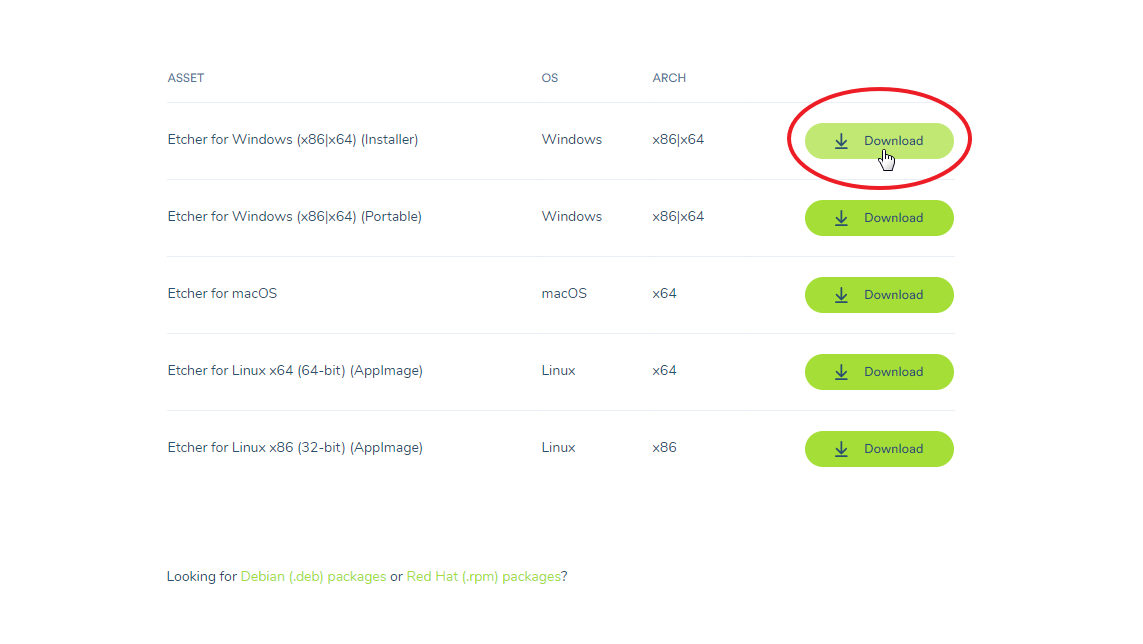
Go to https://www.balena.io/etcher/. Scroll down and download the one for your operating system. As we’re using Windows OS, we will choose the Windows version.
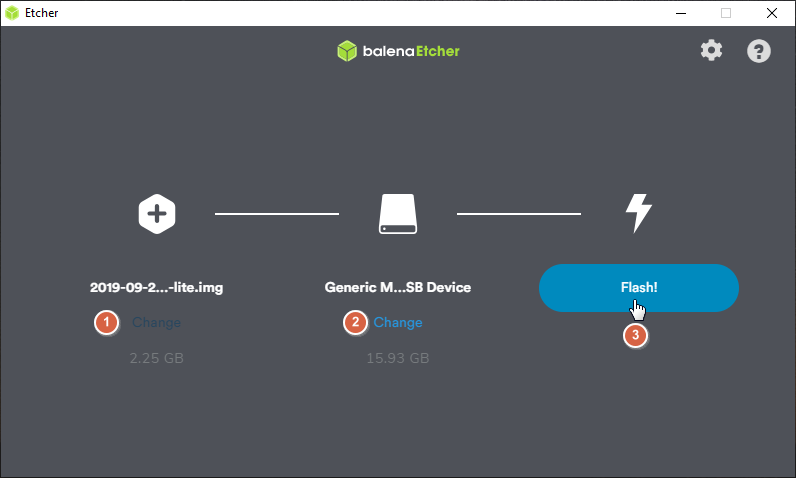
After installing Etcher, insert your SD card into a card reader and plug it into your PC. Now run Etcher.
Choose your downloaded Zip file (Raspbian), your SD card and click on Flash.
It’ll take a couple of minutes before flashing and validating the file.
Headless Raspberry Pi setup
Now It is time for headless raspberry pi setup so once we put the card inside our raspberry pi and power it up, SSH is enabled.
Once the previous step is completed, you will start seeing a Boot folder on your PC. Adding files to this boot folder activates setup features of Raspberry Pi. For headless raspberry pi setup, we will need to enable two things.
- WiFi
- SSH
We will activate WiFi and SSH so that once our Raspberry Pi boots up, It should automatically connect to the WiFi and enable SSH. SSH would allow us to control our Raspberry Pi from our current PC or any other PC within our network. If you don’t plan on connecting your raspberry pi to your network via WiFi or your raspberry pi doesn’t have WiFi. You can then simply connect it with your router via an Ethernet cable and skip the below step for enabling WiFi.
Enable WiFi
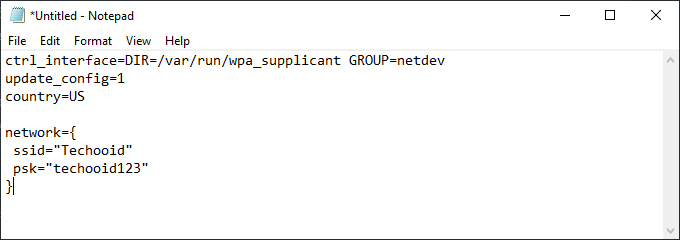
Open up Notepad and paste the following text in It.
ctrl_interface=DIR=/var/run/wpa_supplicant GROUP=netdev
update_config=1
country=<Insert country code here>
network={
ssid=”<Name of your WiFi>”
psk=”<Password for your WiFi>”
}
In the above code, replace the following data with your own values
<Insert country code here> – With your country code. For example, US for USA.
<Name of your WiFi> – Your WiFi SSID.
<Password for your WiFi> – Your WiFi Password.
After replacing the above values, click on File and then Save As.
Enter wpa_supplicant.conf as the file name. Make sure the extension is .conf and not a simple text (txt) file. Save It inside your Boot folder.
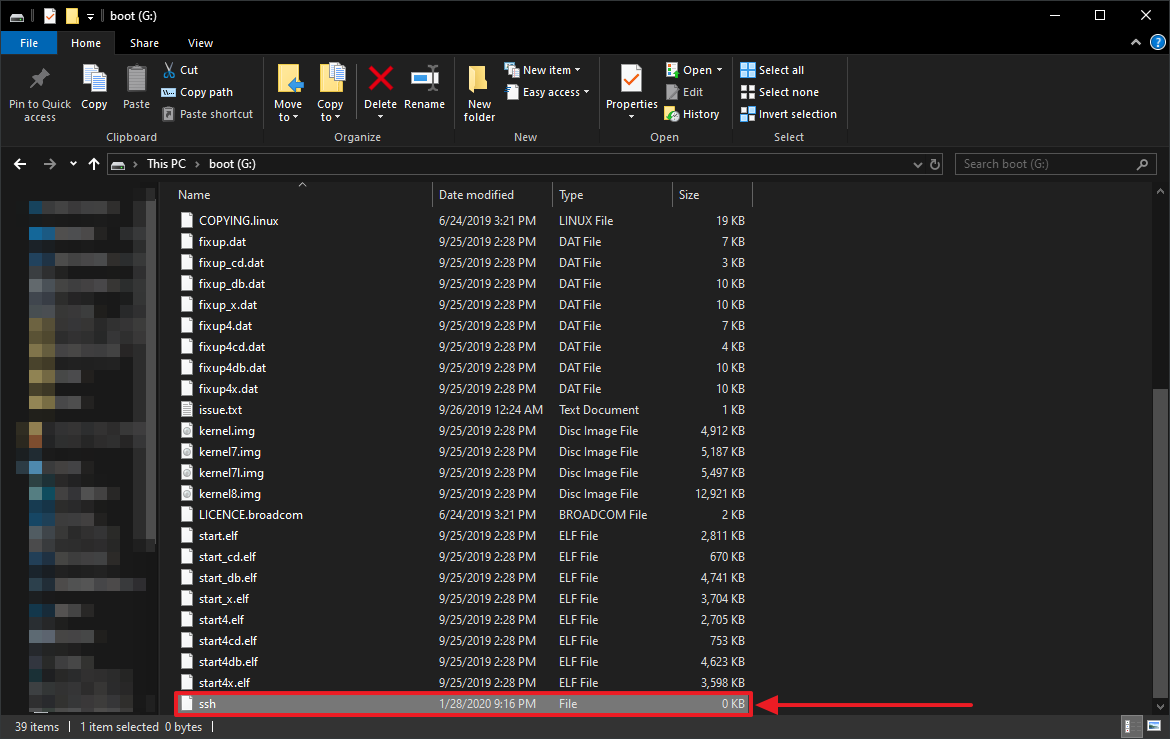
Enable SSH
If you’ve completed the previous step for enabling WiFi or you want to connect your raspberry pi to your network via an Ethernet cable, then you simply want to enable SSH (Secure Shell). For this, create an empty file with name ssh into your boot directory.
Make sure that the ssh is the full name of the file. Don’t add any extension to It.
Power up your Raspberry Pi
Insert your SD card into your Raspberry Pi and power it up. Your SD card would connect to your network and SSH would also be enabled on It.
To SSH into your raspberry pi, you need to find Its IP address. You can get that by visiting your router’s settings page. Go to connected devices/DHCP client list page and you’ll see a device having the name raspberry pi connected.

If for some reason you’re unable to access your router. Then you can download a tool like Advanced IP Scanner and scan your network to find the IP of the raspberry pi.

Your headless raspberry pi setup is ready. You can simply SSH into your raspberry pi by using tools like PuTTY etc. Using this, you won’t need any monitor, keyboard or mouse to control your raspberry pi as you have headless raspberry pi setup.